Getting started with Approval Flow
Approval Flow turns any monday board into a working approval system. You set the rules once, and the app routes every item to the right people, tracks where each one stands, and keeps a record of what happened. Setting up your first flow takes about five minutes.
Before you start
There are two things you need in place:
- You should be an owner of the board you want to add approvals to.
- You need a board with items that you want reviewed and signed off, such as requests, contracts, or content.
1Add Approval Flow to your board
Open the board you want to work with and go to the item view area. Add the Approval Flow view. Once it is added, it shows up as a tab on your items, ready to use.
2Open the app on an item
Open any item on your board and go to the Approval Flow tab. Inside, you will find three sections: Stages, Tracking, and History. Most of your setup happens in Stages.
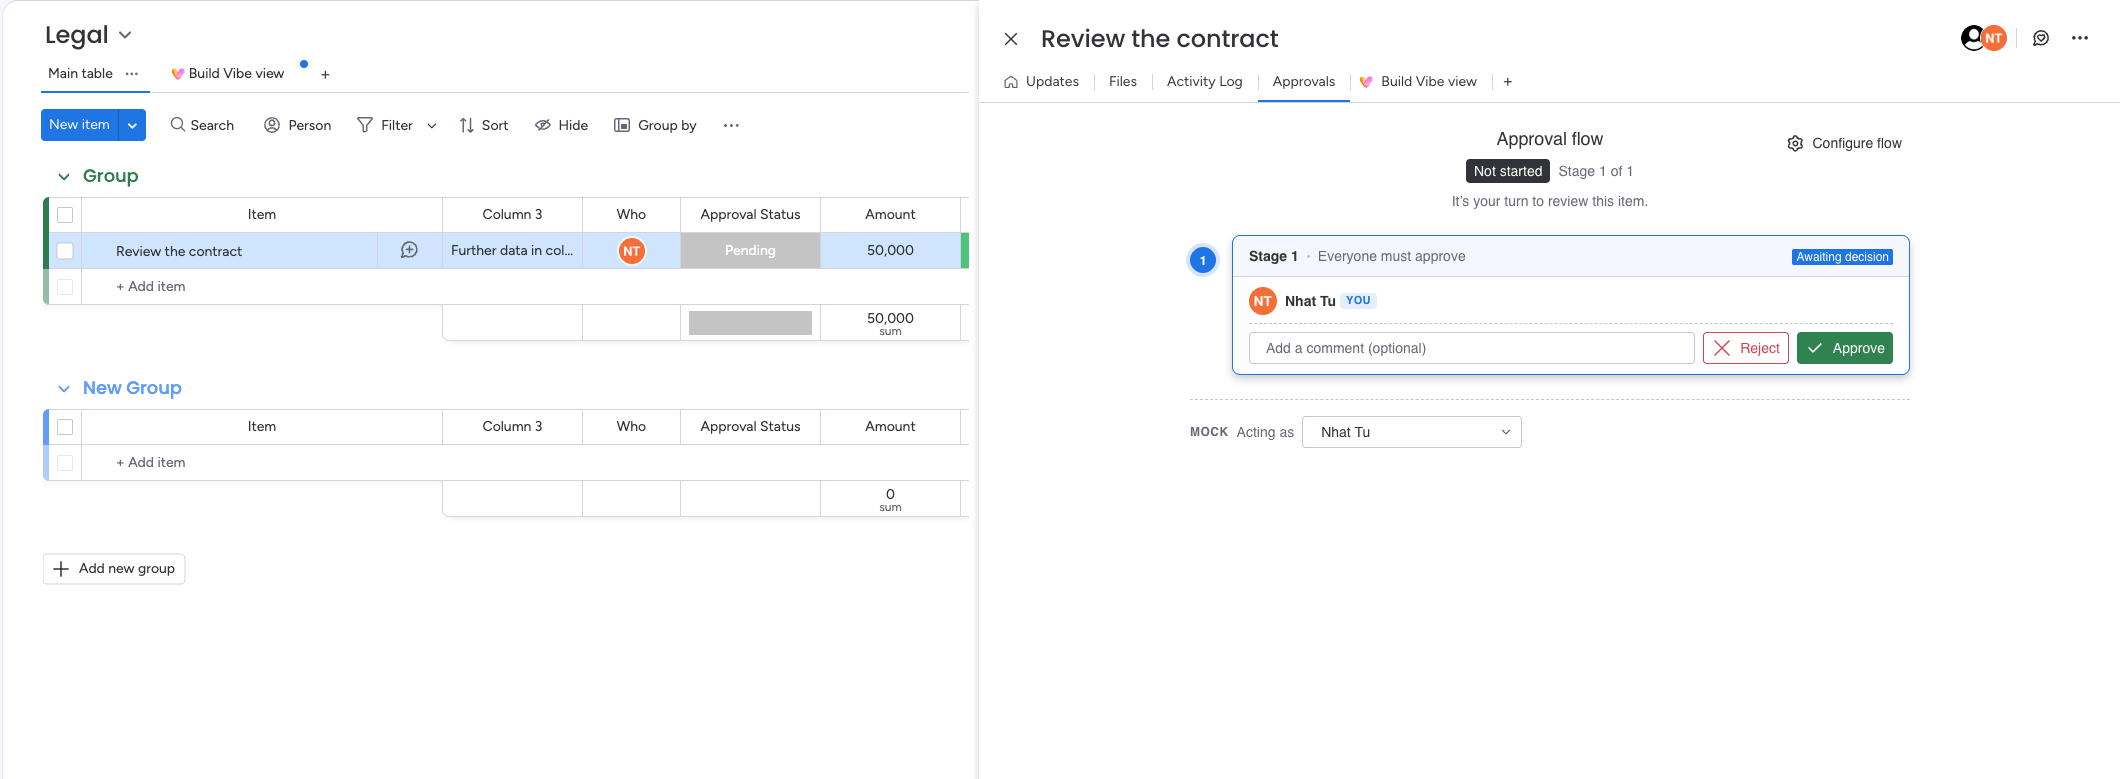
3Build your first flow
A flow is made up of one or more stages that run in order. For each stage, you decide two things.
Who approves. You can pick specific people, or point the stage at a People column on your board so the approver is taken from each item. The People column option is useful when the right approver changes from item to item, such as an assigned manager.
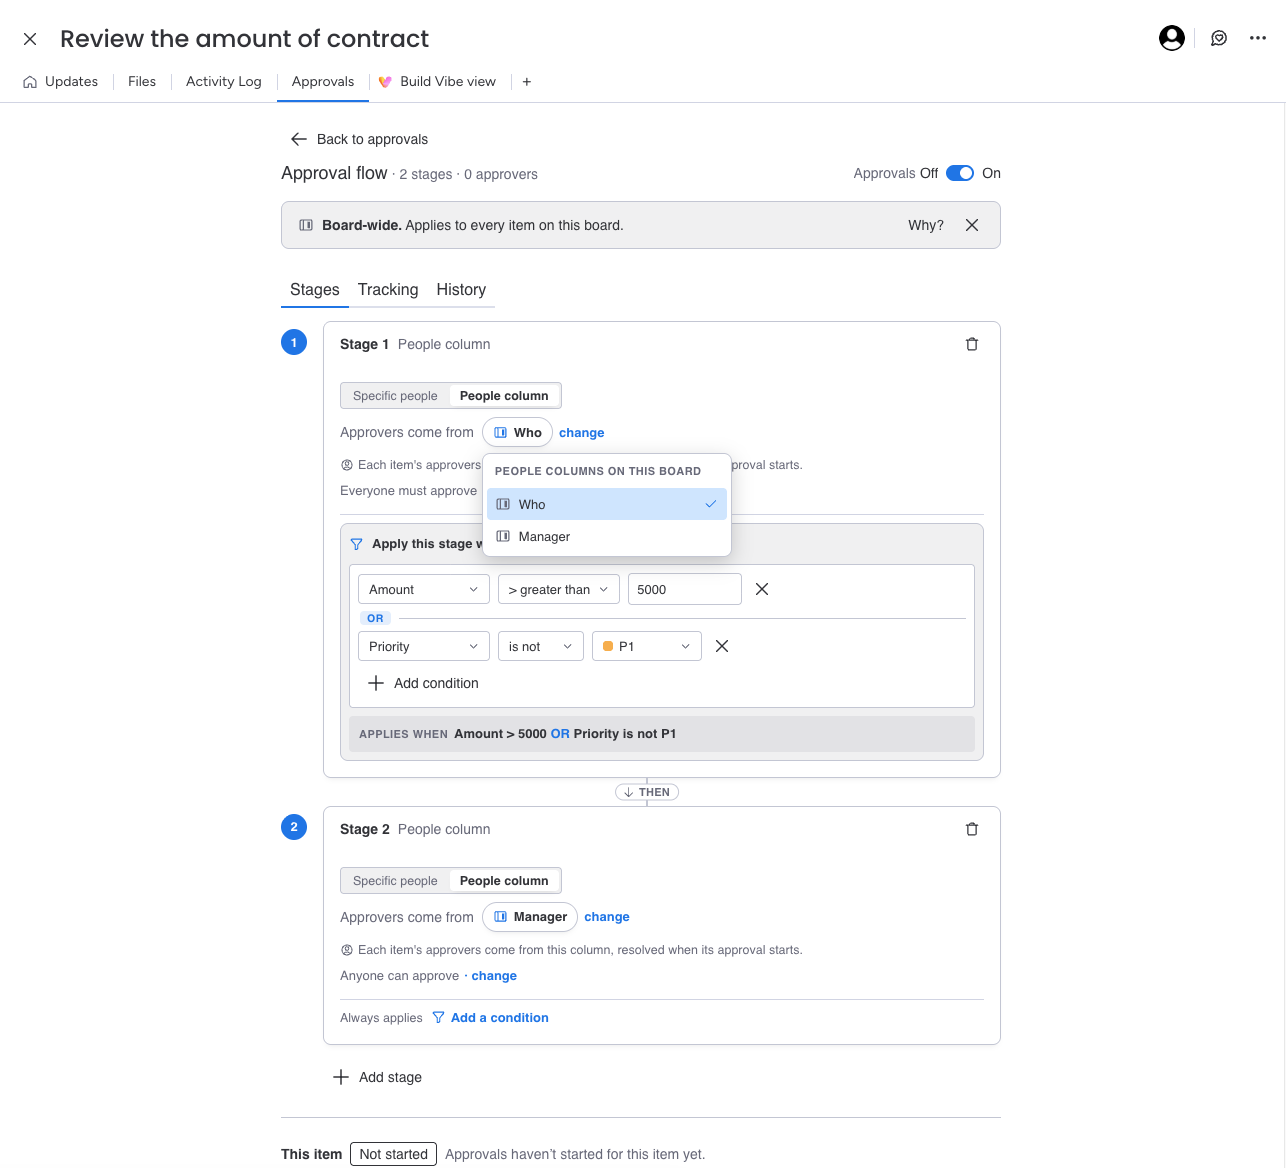
How many need to approve. Choose Everyone, where all approvers in the stage have to sign off, or Anyone, where the first approval clears the stage.
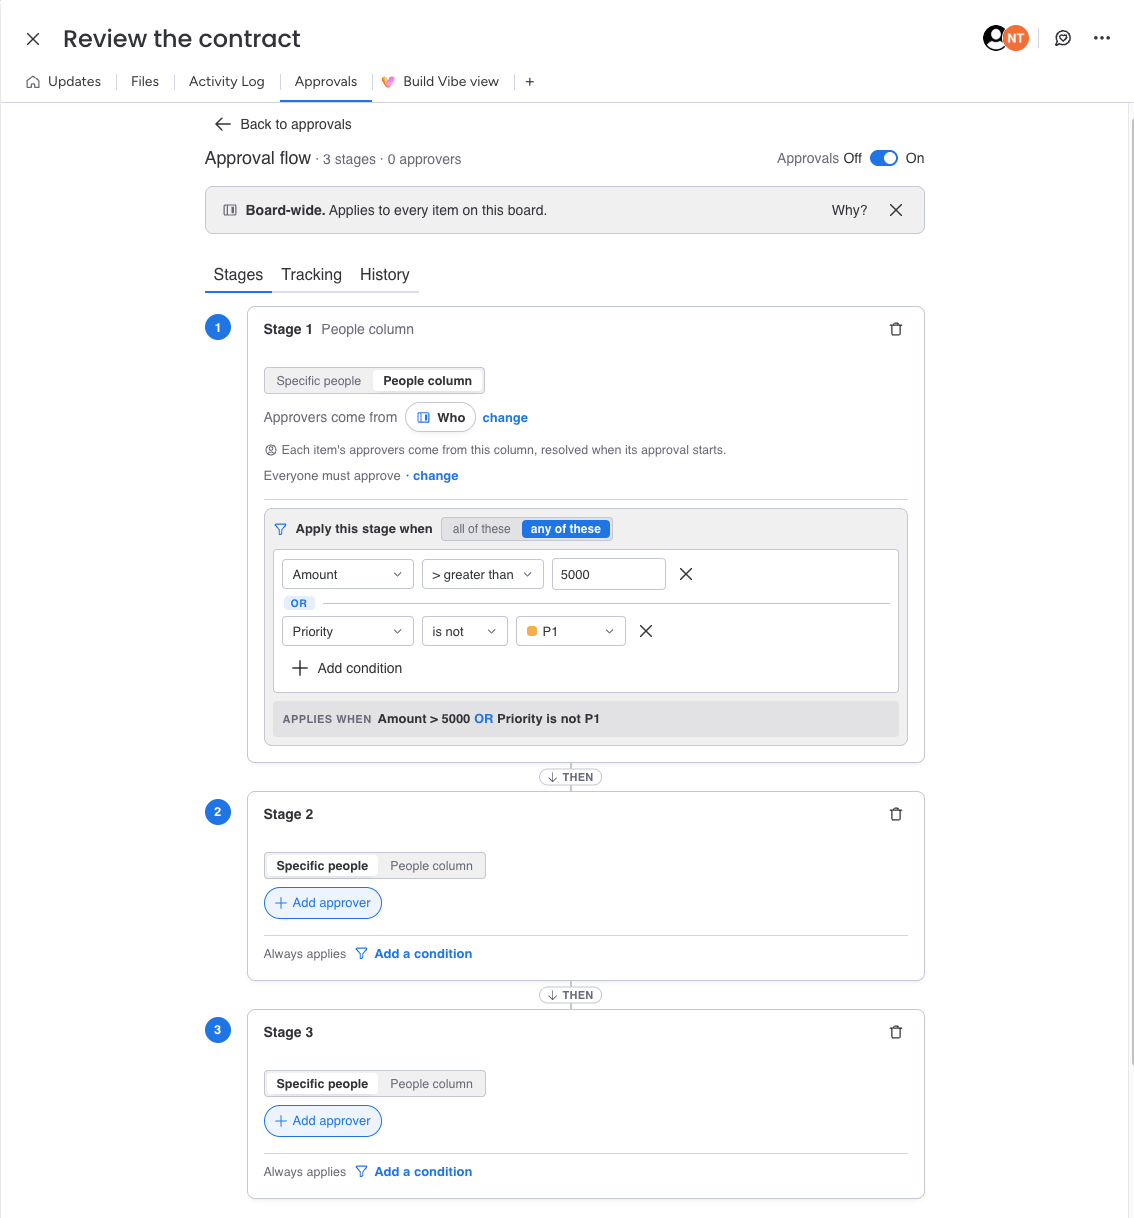
If you need a chain of approvals, add more stages. Stage two only opens once stage one has been approved, and so on down the line.
4Add conditions (optional)
This is where Approval Flow does more than a basic approval tool. You can put a condition on a stage so it only applies when an item matches. For example, you might require the finance lead only when an amount column goes over a number you set. Items that do not match simply skip that stage.
You can combine several conditions and choose whether all of them need to match or just one.
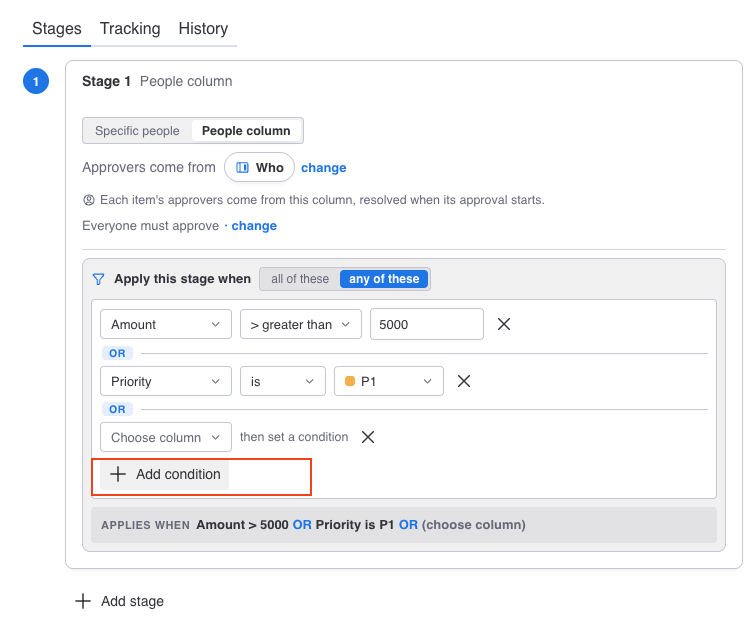
5Turn on board tracking (optional)
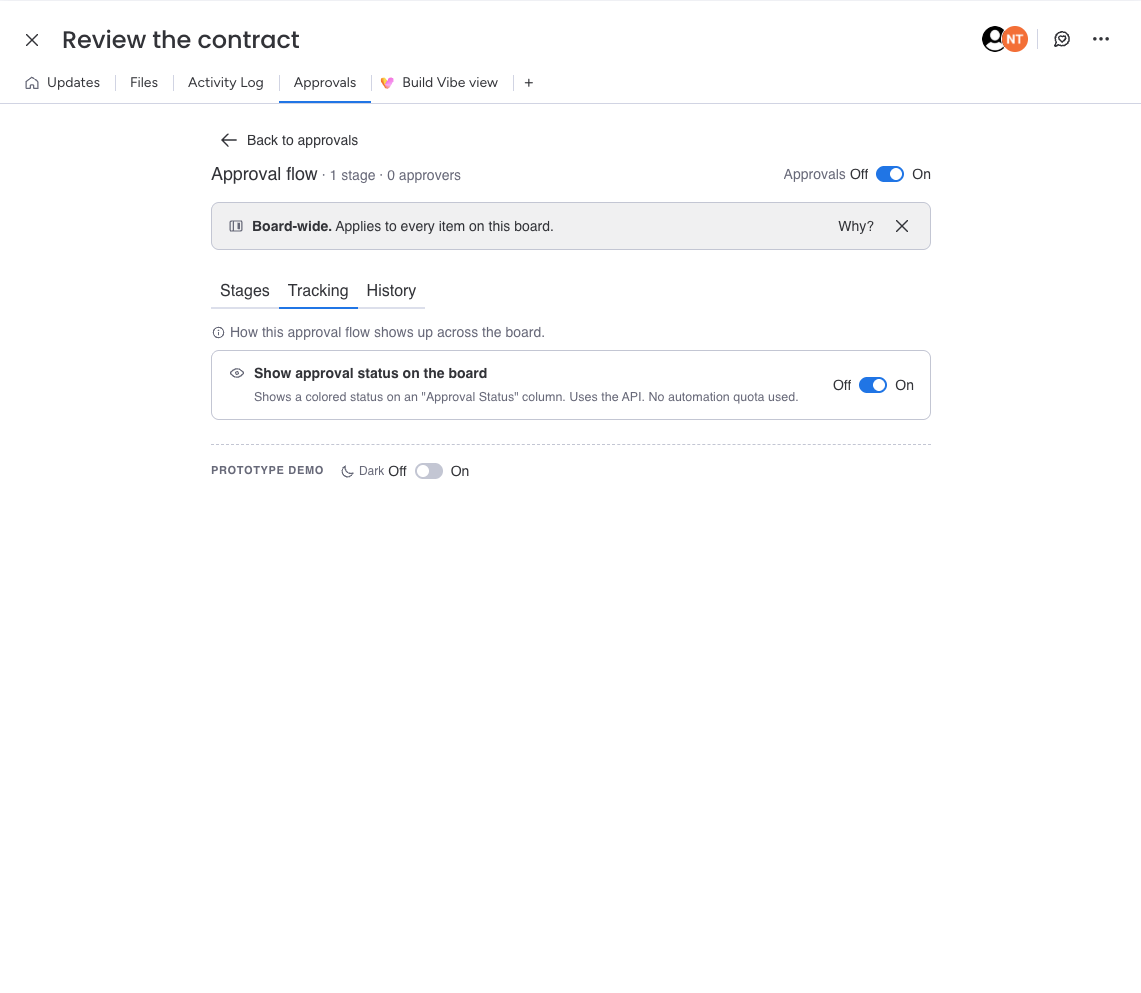
Go to the Tracking tab and switch on board tracking. The app creates an Approval Status column and keeps it up to date as items move through their stages, showing Pending, In Review, Approved, or Rejected. Anyone looking at the board can see where each item stands.
This step is optional. If you leave tracking off, the app still runs your approvals, it just will not write a status column to the board.
6Run an approval
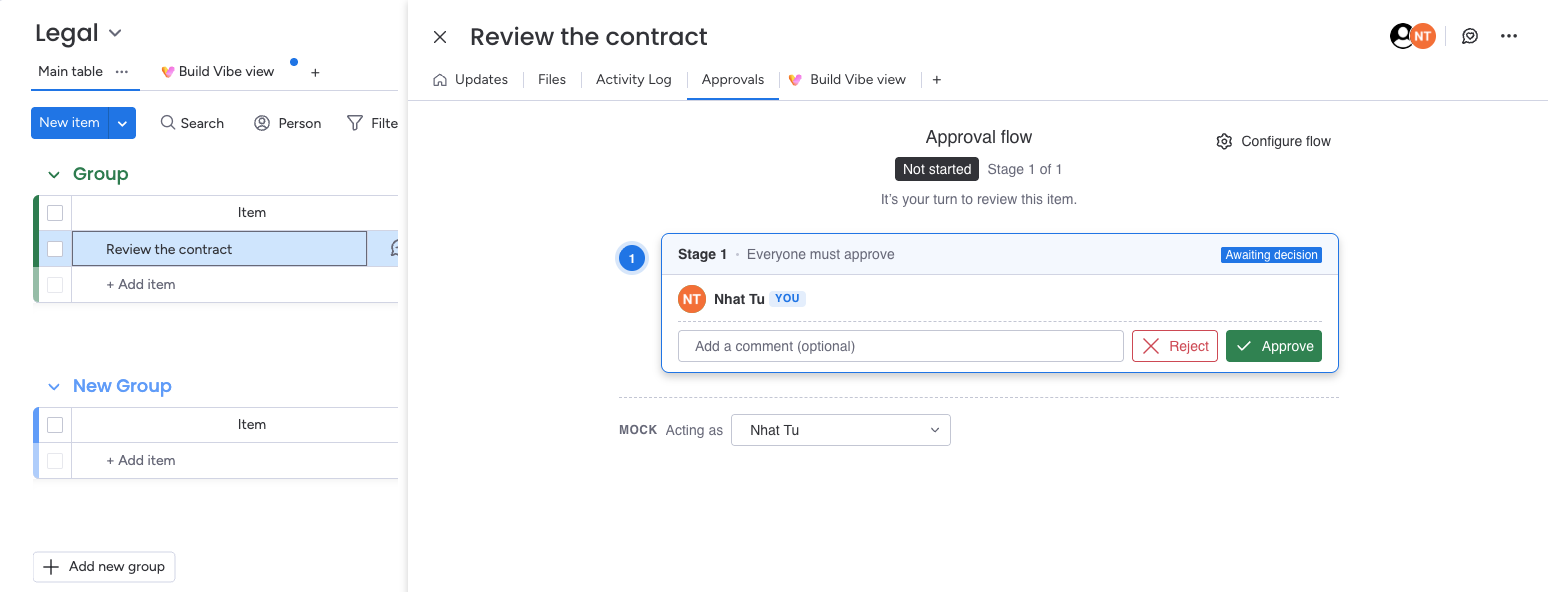
Once a flow is set up, approvers act right from the item. They approve, reject, or leave a comment. As each stage clears, the next one opens on its own, and the approvers for that stage get a notification in monday and by email letting them know it is their turn.
The History tab
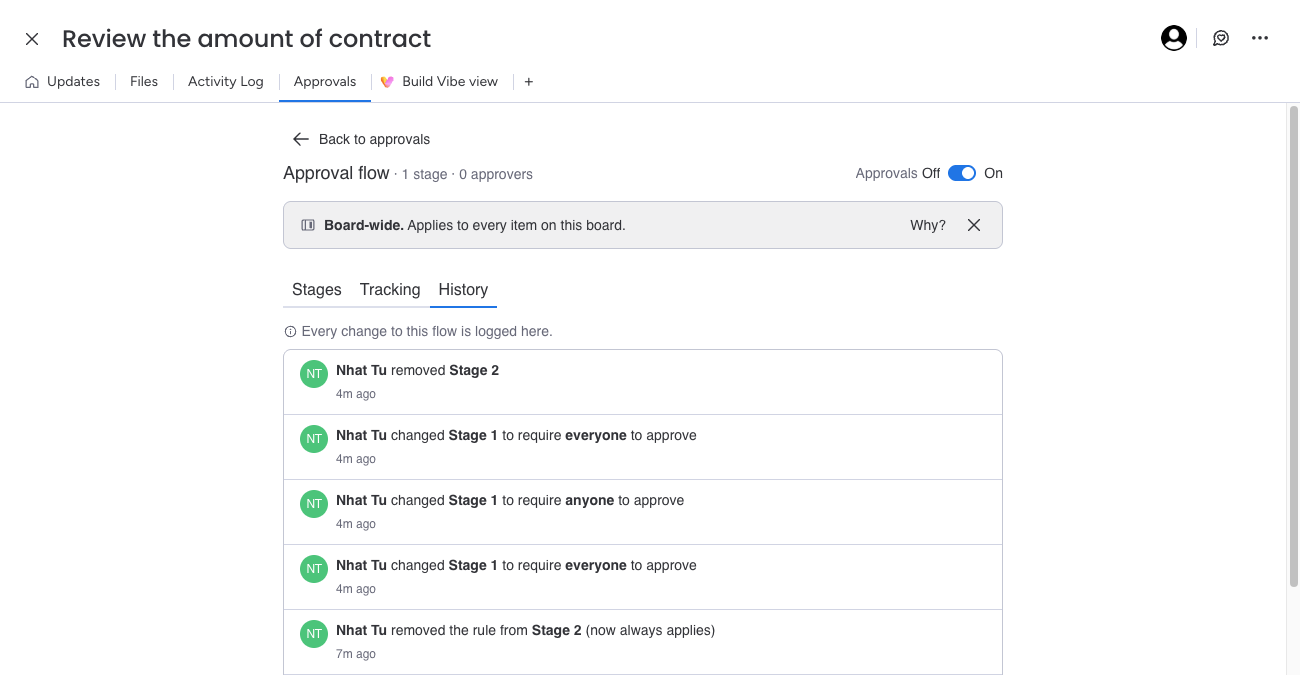
Every change to a flow is recorded in the History tab, including who changed what and when. Approval decisions are logged too, with the person, the time, and any comment they left. If you ever need to explain how an item was approved, the full record is there.
Good to know
- The on and off toggle at the top pauses approvals for the whole board without losing any progress. Turn it back on and everything picks up where it left off.
- Approval Flow works through the monday API rather than automations, so it does not use up the automation action quota on your plan, no matter how many approvals you run.